Spring Boot Logging Example - SLF4j, Logback and LOG4j2
In this article, we learn how to log effectively with Spring Boot. We will look at Spring Boot Starter for Logging. We will look at the defaults in Spring Boot for Logging - Logback, and SLF4J. We will also be looking at the Spring Boot starter for log4j2.
First, we will discuss a few important points about the Spring Boot logging feature and then we will create a simple example to demonstrate the same.
Spring Boot Logging Feature Overview
Logging is a very important part of any application and it helps with debugging issues. Spring Boot, by default, includes spring-boot-starter-logging as a transitive dependency for the spring-boot-starter module. By default, Spring Boot includes SLF4J along with Logback implementations.
If Logback is available, Spring Boot will choose it as the logging handler. You can easily configure logging levels within the application.properties file without having to create logging provider-specific configuration files such as logback.xml or log4j.properties.
logging.level.org.springframework.web=INFO
    logging.level.org.hibernate=ERROR
    logging.level.net.guides=DEBUG
If you want to log the data into a file in addition to the console, specify the filename as follows
logging.path=/var/logs/app.log
    or
    logging.file=myapp.log
If you want to have more control over the logging configuration, create the logging provider-specific configuration files in their default locations, which Spring Boot will automatically use. For example, if you place the logback.xml file in the root classpath, Spring Boot will automatically use it to configure the logging system
The logback.xml File
Here is the sample logback.xml file for your reference:
<configuration>
    <appender name="STDOUT"
        class="ch.qos.logback.core.ConsoleAppender">
        <encoder>
            <pattern>%d{HH:mm:ss.SSS} [%thread] %-5level %logger{36} - %msg%n</pattern>
        </encoder>
    </appender>
    <appender name="FILE" class="ch.qos.logback.core.FileAppender">
        <file>app.log</file>
        <encoder>
            <pattern>%date %level [%thread] %logger{10} [%file:%line] %msg%n </pattern>
        </encoder>
    </appender>
    <logger name="com.apress" level="DEBUG" additivity="false">
        <appender-ref ref="STDOUT" />
        <appender-ref ref="FILE" />
    </logger>
    <root level="INFO">
        <appender-ref ref="STDOUT" />
        <appender-ref ref="FILE" />
    </root>
</configuration>
Using Log4j2 for logging with Spring Boot
If you want to use other logging libraries, such as Log4J or Log4j2, instead of Logback, you can exclude spring-boot-starter-logging and include the respective logging starter, as follows:
<dependency>
    <groupId>org.springframework.boot</groupId>
    <artifactId>spring-boot-starter</artifactId>
    <exclusions>
        <exclusion>
            <groupId>org.springframework.boot</groupId>
            <artifactId>spring-boot-starter-logging</artifactId>
        </exclusion>
    </exclusions>
</dependency>
<dependency>
    <groupId>org.springframework.boot</groupId>
    <artifactId>spring-boot-starter-log4j</artifactId>
</dependency>
Now you can add the log4j.properties file to the root classpath, which Spring Boot will automatically use for logging.
Log Format
The default log output from Spring Boot resembles the following example:
2014-03-05 10:57:51.112  INFO 45469 --- [           main] org.apache.catalina.core.StandardEngine  : Starting Servlet Engine: Apache Tomcat/7.0.52
    2014-03-05 10:57:51.253  INFO 45469 --- [ost-startStop-1] o.a.c.c.C.[Tomcat].[localhost].[/]       : Initializing Spring embedded WebApplicationContext
    2014-03-05 10:57:51.253  INFO 45469 --- [ost-startStop-1] o.s.web.context.ContextLoader            : Root WebApplicationContext: initialization completed in 1358 ms
    2014-03-05 10:57:51.698  INFO 45469 --- [ost-startStop-1] o.s.b.c.e.ServletRegistrationBean        : Mapping servlet: 'dispatcherServlet' to [/]
    2014-03-05 10:57:51.702  INFO 45469 --- [ost-startStop-1] o.s.b.c.embedded.FilterRegistrationBean  : Mapping filter: 'hiddenHttpMethodFilter' to: [/*]
Console Output
The default log configuration echoes messages to the console as they are written. By default, ERROR-level, WARN-level, and INFO-level messages are logged. You can also enable a “debug” mode by starting your application with a --debug flag.
$ java -jar myapp.jar --debug
You can also specify debug=true in your application.properties.
File Output
By default, Spring Boot logs only to the console and does not write log files. If you want to write log files in addition to the console output, you need to set a logging.file or logging.path property (for example, in your application.properties).
So far we understood, how logging works in Spring Boot and default configurations. Now it's time to use Spring Boot 2 logging feature in our project so let's create an example to demonstrate how to use Spring Boot 2 logging feature.
Simple Spring Boot Logging Application
Let's develop a simple in-memory Spring Boot logging application to demonstrate the usage of Logback and log4j.
1. Create Spring Boot Project
There are many ways to create a Spring Boot application. The simplest way is to use Spring Initializr at http://start.spring.io/, which is an online Spring Boot application generator.
2. Maven pom.xml File
<?xml version="1.0" encoding="UTF-8"?>
    <project xmlns="http://maven.apache.org/POM/4.0.0"
     xmlns:xsi="http://www.w3.org/2001/XMLSchema-instance"
     xsi:schemaLocation="http://maven.apache.org/POM/4.0.0 http://maven.apache.org/xsd/maven-4.0.0.xsd">
     <modelVersion>4.0.0</modelVersion>

        <groupId>net.guides.springboot2</groupId>
        <artifactId>springboot2-logging</artifactId>
        <version>0.0.1-SNAPSHOT</version>
        <packaging>jar</packaging>

        <name>springboot2-logging</name>
        <description>Demo project for Spring Boot</description>

        <parent>
            <groupId>org.springframework.boot</groupId>
            <artifactId>spring-boot-starter-parent</artifactId>
            <version>3.0.4</version>
            <relativePath /> <!-- lookup parent from repository -->
        </parent>

        <properties>
            <project.build.sourceEncoding>UTF-8</project.build.sourceEncoding>
            <project.reporting.outputEncoding>UTF-8</project.reporting.outputEncoding>
            <java.version>17</java.version>
        </properties>

        <dependencies>
            <dependency>
                <groupId>org.springframework.boot</groupId>
                <artifactId>spring-boot-starter-web</artifactId>
            </dependency>
            <dependency>
                <groupId>org.springframework.boot</groupId>
                <artifactId>spring-boot-starter-test</artifactId>
                <scope>test</scope>
            </dependency>
        </dependencies>

        <build>
            <plugins>
                <plugin>
                    <groupId>org.springframework.boot</groupId>
                    <artifactId>spring-boot-maven-plugin</artifactId>
                </plugin>
            </plugins>
        </build>
    </project>
3. Packaging Structure
.PNG)
4. Create Simple POJO Class - Article.java
package net.guides.springboot2.springboot2logging;

    public class Article {
        private int id;
        private String name;


        public Article(int id, String name) {
            super();
            this.id = id;
            this.name = name;
        }

        public int getId() {
            return id;
        }
        public void setId(int id) {
            this.id = id;
        }
        public String getName() {
            return name;
        }
        public void setName(String name) {
            this.name = name;
        }
    }
5. Create Simple Service Class - ArticleService.java
package net.guides.springboot2.springboot2logging;

        import java.util.Arrays;
        import java.util.List;

        import org.slf4j.Logger;
        import org.slf4j.LoggerFactory;
        import org.springframework.stereotype.Service;

        @Service
        public class ArticleService {
            private static final Logger logger = LoggerFactory.getLogger(ArticleService.class);
            public List<Article> getArticles(){
                logger.debug("inside getArticles() method");
                return Arrays.asList(new Article(100, "article"),new Article(200, "article2"));
            }
        }
Note that we have added the slf4j Logger and also added debug statements:
private static final Logger logger = LoggerFactory.getLogger(ArticleService.class);
6. Create Simple Rest Controller - ArticleController.java
package net.guides.springboot2.springboot2logging;

    import java.util.List;

    import org.slf4j.Logger;
    import org.slf4j.LoggerFactory;
    import org.springframework.beans.factory.annotation.Autowired;
    import org.springframework.web.bind.annotation.GetMapping;
    import org.springframework.web.bind.annotation.RestController;

    @RestController
    public class ArticleController {
        private static final Logger logger = LoggerFactory.getLogger(ArticleService.class);
        @Autowired
        private ArticleService articleService;
        @GetMapping("/articles")
        public List<Article> getArticles() {
            logger.debug("inside ArticleController.getArticles() method");
            return articleService.getArticles();
        }
    }
7. The application.properties File
Let's configure logging properties in an application.properties file.
Open an application.properties file and add the following logging configuration to it.
logging.level.org.springframework.web=INFO
        logging.level.org.hibernate=ERROR
        logging.level.net.guides=DEBUG

        logging.file=myapp.log
8. Running an Application
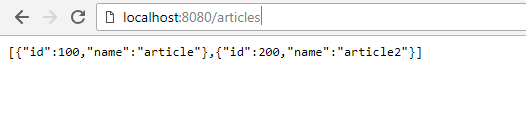
Now run the Spring boot application and call the REST API: http://localhost:8080/articles. You should see the list of articles in JSON format.
[{"id":100,"name":"article"},{"id":200,"name":"article2"}]
Note that the myapp.log file is created at your correct project location.

Note that we have added the slf4j Logger and also added debug statements. These debug statements are printed in a console.