How to Create a Simple Maven Project in Eclipse
In this article, we will show you how to create a simple maven project in Eclipse IDE. We can also create a simple maven project using the command line, check out the same at Create a Simple Maven Project using Command-Line.
Tools and technologies used
- Eclipse Neon
- Maven - 3.5.3
- JDK - 1.8
Let's create step by step a simple maven project in Eclipse IDE.
Step-1
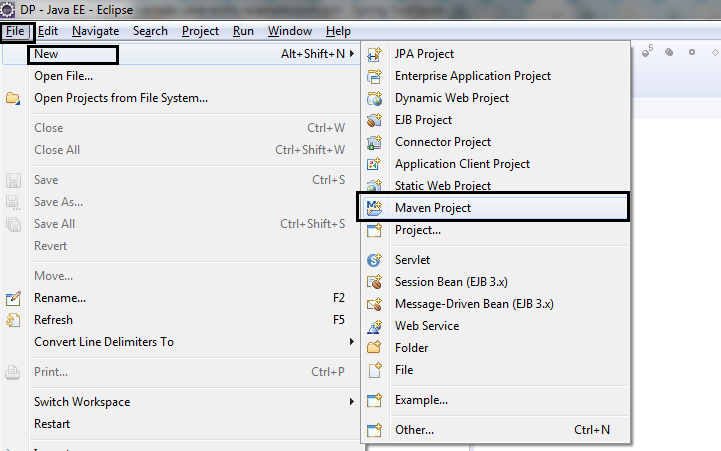
- Open Eclipse
- Click on File -> New -> Maven Project
Step-2
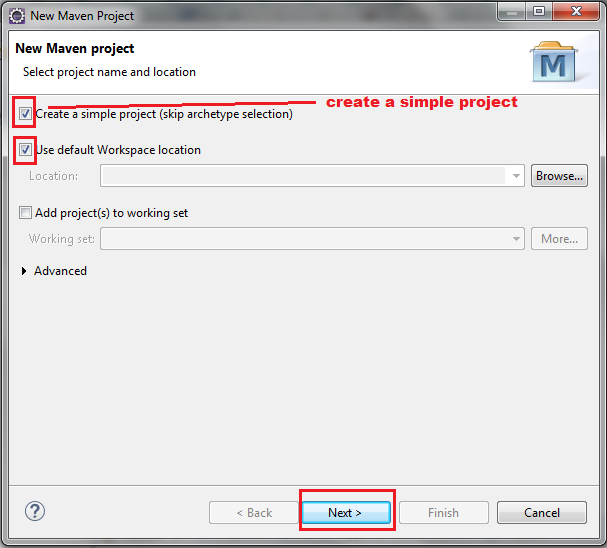
Click on Checkbox for both
- Create a simple project
- Use default Workspace location
- Click on next button
Step-3
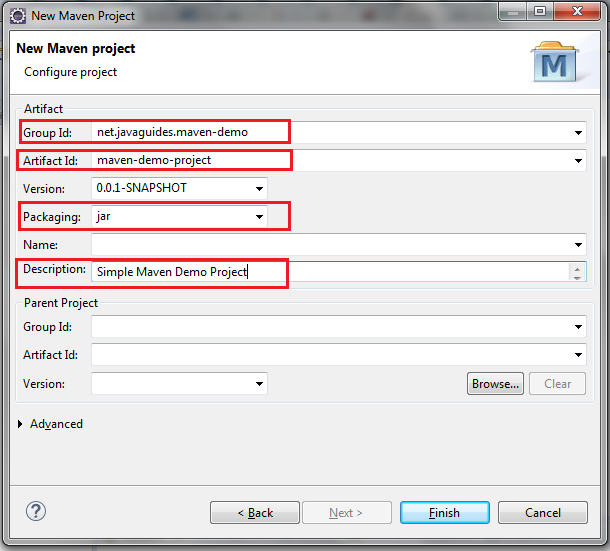
Provide GroupId and ArtifactId in next screen.
- GroupId: net.javaguides.maven-demo
- Artifact Id: maven-demo-project
- Name: maven-demo-project
- Description: Simple Maven Demo Project
Step-4
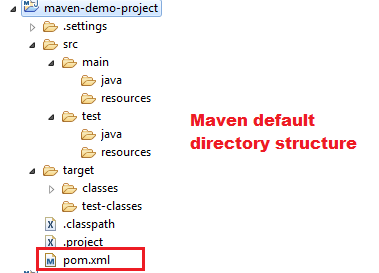
And you are all set. You should see a new Project in Eclipse with below structure.
Step-5
As you can see in the maven project structure, the default java compiler version ( i.e. source and target setting ) is 1.5. To change the default settings, add the following snippet to pom.xml.
                <build>
                    <plugins>
                        <plugin>
                            <groupId>org.apache.maven.plugins</groupId>
                            <artifactId>maven-compiler-plugin</artifactId>
                            <version>3.6.0</version>
                            <configuration>
                                <source>1.8</source>
                                <target>1.8</target>
                            </configuration>
                        </plugin>
                    </plugins>
                </build>
After changes in pom.xml file, update the maven project. To update maven project right click on maven-project → Maven → Update Project.
Step-6
Add some dependencies to pom.xml file. Here we are adding junit dependency to pom.xml.
    <project
        xmlns="http://maven.apache.org/POM/4.0.0"
        xmlns:xsi="http://www.w3.org/2001/XMLSchema-instance"
        xsi:schemaLocation="http://maven.apache.org/POM/4.0.0 http://maven.apache.org/xsd/maven-4.0.0.xsd">
        <modelVersion>4.0.0</modelVersion>
        <groupId>net.javaguides.maven-demo</groupId>
        <artifactId>maven-demo-project</artifactId>
        <version>0.0.1-SNAPSHOT</version>
        <description>Simple Maven Demo Project</description>
        <dependencies>
            <dependency>
                <groupId>junit</groupId>
                <artifactId>junit</artifactId>
                <version>4.12</version>
            </dependency>
        </dependencies>
        <build>
            <plugins>
                <plugin>
                    <groupId>org.apache.maven.plugins</groupId>
                    <artifactId>maven-compiler-plugin</artifactId>
                    <version>3.6.0</version>
                    <configuration>
                        <source>1.8</source>
                        <target>1.8</target>
                    </configuration>
                </plugin>
            </plugins>
        </build>
    </project>
Let's test our created project by creating a simple JUnit test.
Step 7
Create a package, named as net.javaguides.simpleproject, under src/test/java folder. Now create a class AppTest.java under src/test/java package and write the following code in it.
package net.javaguides.simpleproject;

    import org.junit.Assert;
    import org.junit.Test;

    public class AppTest {
        @Test
        public void test() {
            Assert.assertEquals("Hello Maven", new String("Hello Maven"));
        }
    }
Step-8
Run your first maven project. Right click on AppTest.java → Run as → JUnit Test.
