❖ Typescript is an open-source programming language.
It’s advantage are:
1. Typescript is a strongly typed language.
2. Typescript is a superset of JavaScript.
3. It has Object oriented features.
4. Detect error at compile time.
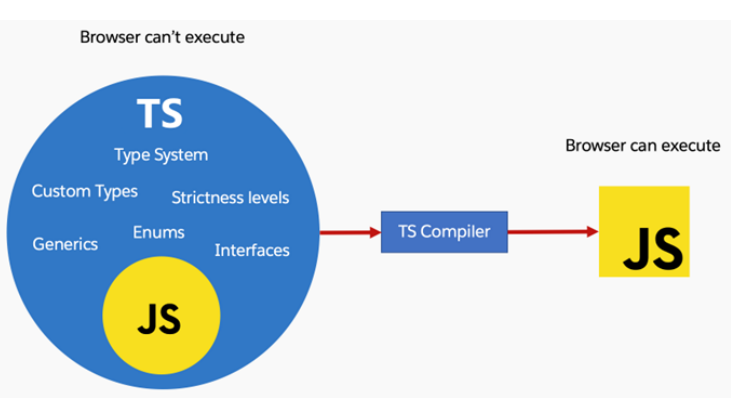
❖ In image, you can see TS(Typescript) contains
JS(Javascript) and other additional features(type
system, custom types, generics, enums, interfaces).
❖ Browser can’t execute typescript, so finally TS
Compiler will convert the TS to JS only, which
browser can understand.